

实例代码及运行过程
请通过这个链接下载实例代码包:https://data.jianshukeji.com/upload/20170907/yvwmwm.zip
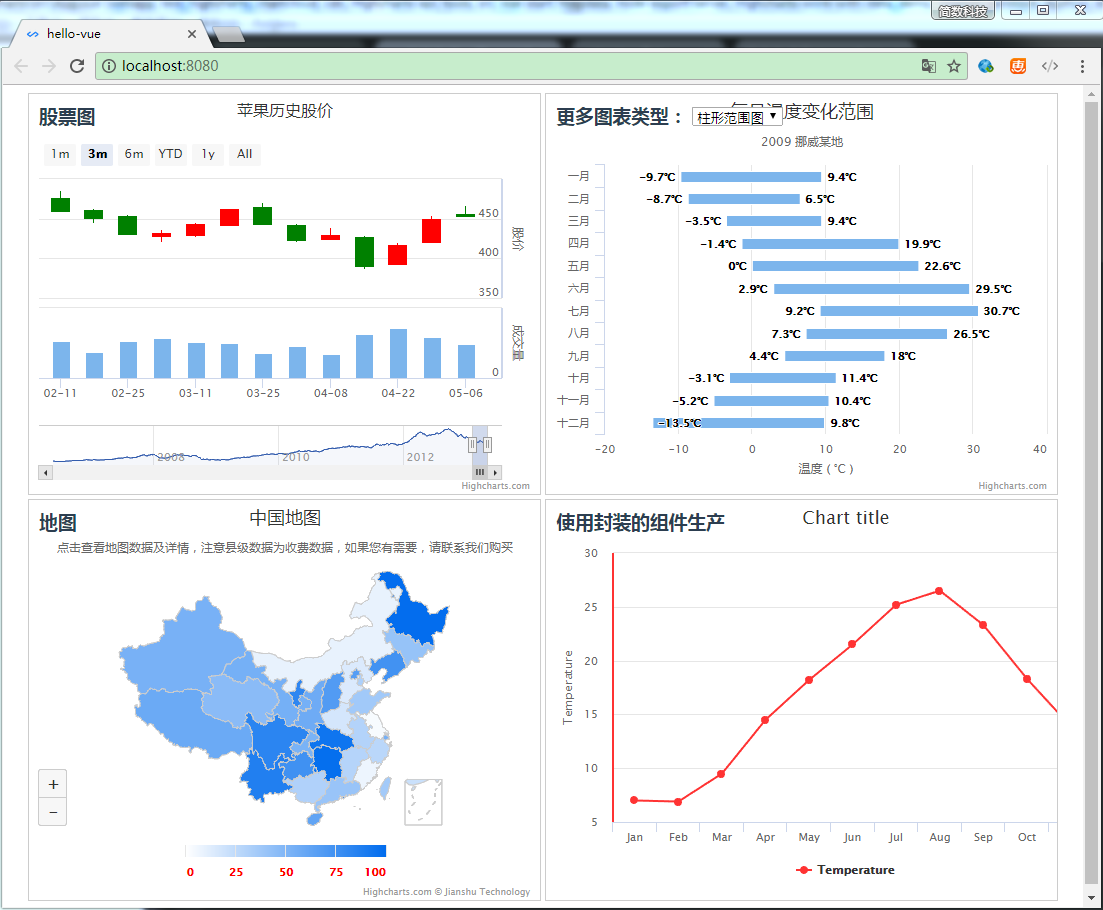
下载后解压并进入实例代码目录,执行 npm install 安装相关依赖,并通过 npm run dev 查看运行效果,如下图所示:
代码说明
实例代码是通过 vue-cli 生成的 hello-vue 项目,这个过程是:
npm install vue-cli -g
vue init webpack-simple hello-vue
安装并引入 Highcharts 相关资源
npm install highcharts --save
对应的代码引入是
import Highcharts from 'highcharts/highstock';
import HighchartsMore from 'highcharts/highcharts-more';
import HighchartsDrilldown from 'highcharts/modules/drilldown';
import Highcharts3D from 'highcharts/highcharts-3d';
import Highmaps from 'highcharts/modules/map';

HighchartsMore(Highcharts)
HighchartsDrilldown(Highcharts);
Highcharts3D(Highcharts);
Highmaps(Highcharts);
需要注意的是 Highcharts 其他资源除了引入文件外,还需要额外的执行 HighchartsMore(Highcharts) 等操作。
引入 Highcharts 之后,就是调用初始化函数生成图表了,示例代码:
// 代码出自实例代码中 /src/App.vue
moreChart() {
    var options = this.getMoreOptions(this.type);

    if (this.chart) {
        this.chart.destroy();
    };
    // 初始化 Highcharts 图表
    this.chart = new Highcharts.Chart('highcharts-more', options);
}
简单的封装一个 Components
Components 是 Vue 中非常重要的特性,这里我们也可以简单的封装一个 Highcharts 图表组件,代码如下:
<template>
  <div class="highcharts-container"></div>
</template>

<script>
import Highcharts from 'highcharts/highstock';
import HighchartsMore from 'highcharts/highcharts-more';
import HighchartsDrilldown from 'highcharts/modules/drilldown';
import Highcharts3D from 'highcharts/highcharts-3d';
HighchartsMore(Highcharts)
HighchartsDrilldown(Highcharts);
Highcharts3D(Highcharts);

export default {
  props: ['options', 'styles'],
  name: 'highcharts',
  data() {
    return {
      chart: null
    }
  },
  mounted() {
    this.initChart();
  },
  methods: {
    initChart() {
      console.log(this.$el);
      this.$el.style.width = (this.styles.width || 800) + 'px';
      this.$el.style.height = (this.styles.height || 400) + 'px';
      this.chart = new Highcharts.Chart(this.$el, this.options);
    }
  }
}
</script>

<style lang="scss">
  .highcharts-container {
    width: 800px;
    height: 400px;
  }
</style>
代码实现逻辑很简单,通过传入配置和简单的样式到组件,由组件生成图表。
组件调用:
<highcharts-component :options="options" :styles="styles" ref="simpleChart"></highcharts-component>
在外部,可以通过 ref 来获取组件里的图表对象并进行图表操作
this.$refs.simpleChart.chart.series[0].update({
  color: '#000'
});
Highcharts 第三方插件的使用
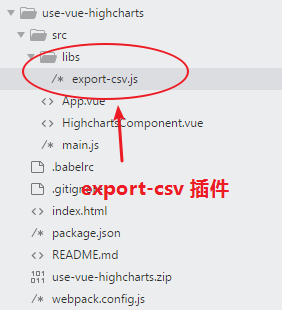
由于很多 Highcharts 插件并没有发布到 Npm,所以很多用户不知道如何使用,下面我们就 export-csv 这个插件来简单说明如何在 Vue 中使用
首先是将插件文件下载并保存到项目的某个目录,这里放置在和 libs 目录
接下来就是引入这个插件,引入方式同普通的 npm 包,只不过是指定具体的文件路径
import exportCSV from './libs/export-csv.js';
exportCSV(Highcharts);
需要注意的是 export-csv 这个插件本身是支持 import 直接引入的,也就是它的主要代码是用下面的代码片段包裹:
(function (factory) {
  if (typeof module === 'object' && module.exports) {
    module.exports = factory;
  } else {
    factory(Highcharts);
  }
})(function (Highcharts) {
  // 插件代码逻辑
});
上面代码片段的含义是使改文件支持以 CommonJS 包的形式引入,即支持 import 语法。
如果你在使用其他插件是没有对应的代码片段,可以将其代码放置在上面代码片段内部即可。